1. Create a new dbt project
This is a step-by-step introduction intended for beginners.
If you are already familiar with the basics of Conveyor, our how-to guides are probably more appropriate.
In this tutorial you will create and deploy a new batch processing project using dbt, a popular tool for doing Transformations, described in SQL. The transformations are the T in an ETL (Extract, Transform, Load) pipeline.
1.1 Create the project
As example code we will make use of this very simple dbt project.
From the Conveyor UI home screen, click on the projects tab and click on the Create a new project button.
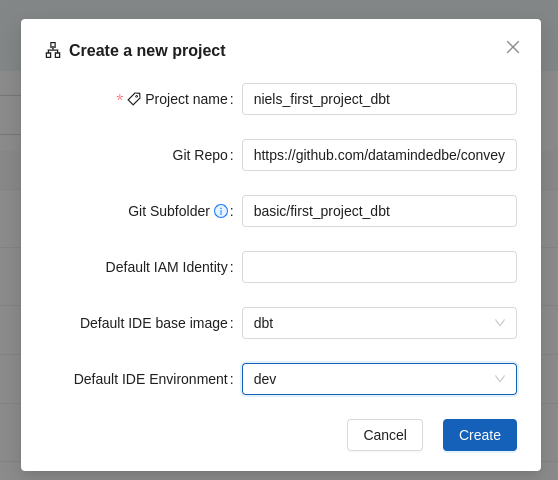
In the form that appears, fill in at least the following fields:
- Project name:
<your-name>_first_project_dbt - Git Repo:
https://github.com/datamindedbe/conveyor-samples.git - Git Subfolder:
basic/first_project_dbt - Default Base Image id:
dbt(if it exists otherwise set it to default)
The form should look something like this:
If your Conveyor tenant does not have a dbt base image configured, you can select the default base image. For more details about base images, see our reference.
Make sure to remember the project name, as you will need it in one of the next steps.
1.2 Customize the IDE for your project
If you do not have a dbt base image, you will need to customize the default IDE such that it has the correct tools installed. If you have a dbt base image, you can skip this step.
Copy the following code and write it to a file called ide.yaml:
vscode:
  extensions:
    - innoverio.vscode-dbt-power-user
    - RobertOstermann.vscode-sqlfluff
    - mtxr.sqltools
    - mtxr.sqltools-driver-pg
    - koszti.snowflake-driver-for-sqltools
buildSteps:
  - name: intall dbt with the standard adapters
    cmd: |
      sudo apt-get update
      sudo apt-get install python3-pip
      sudo pip3 install dbt-core==1.7.8 dbt-duckdb==1.7.1 dbt-postgres==1.7.8 dbt-redshift==1.7.3 dbt-snowflake==1.7.2 dbt-trino==1.7.1
Go to the settings page of your project and click on the + button next to Default IDE configuration.
The form should look something like this:

Finish this step by clicking the save button.
1.3 Start an IDE containing your project
From your dbt project page, click on the IDE button in the upper right corner. You will see a form with the current IDE settings, which should look similar to:

You will need to select an environment, pick one from the list, but all other defaults should be good.
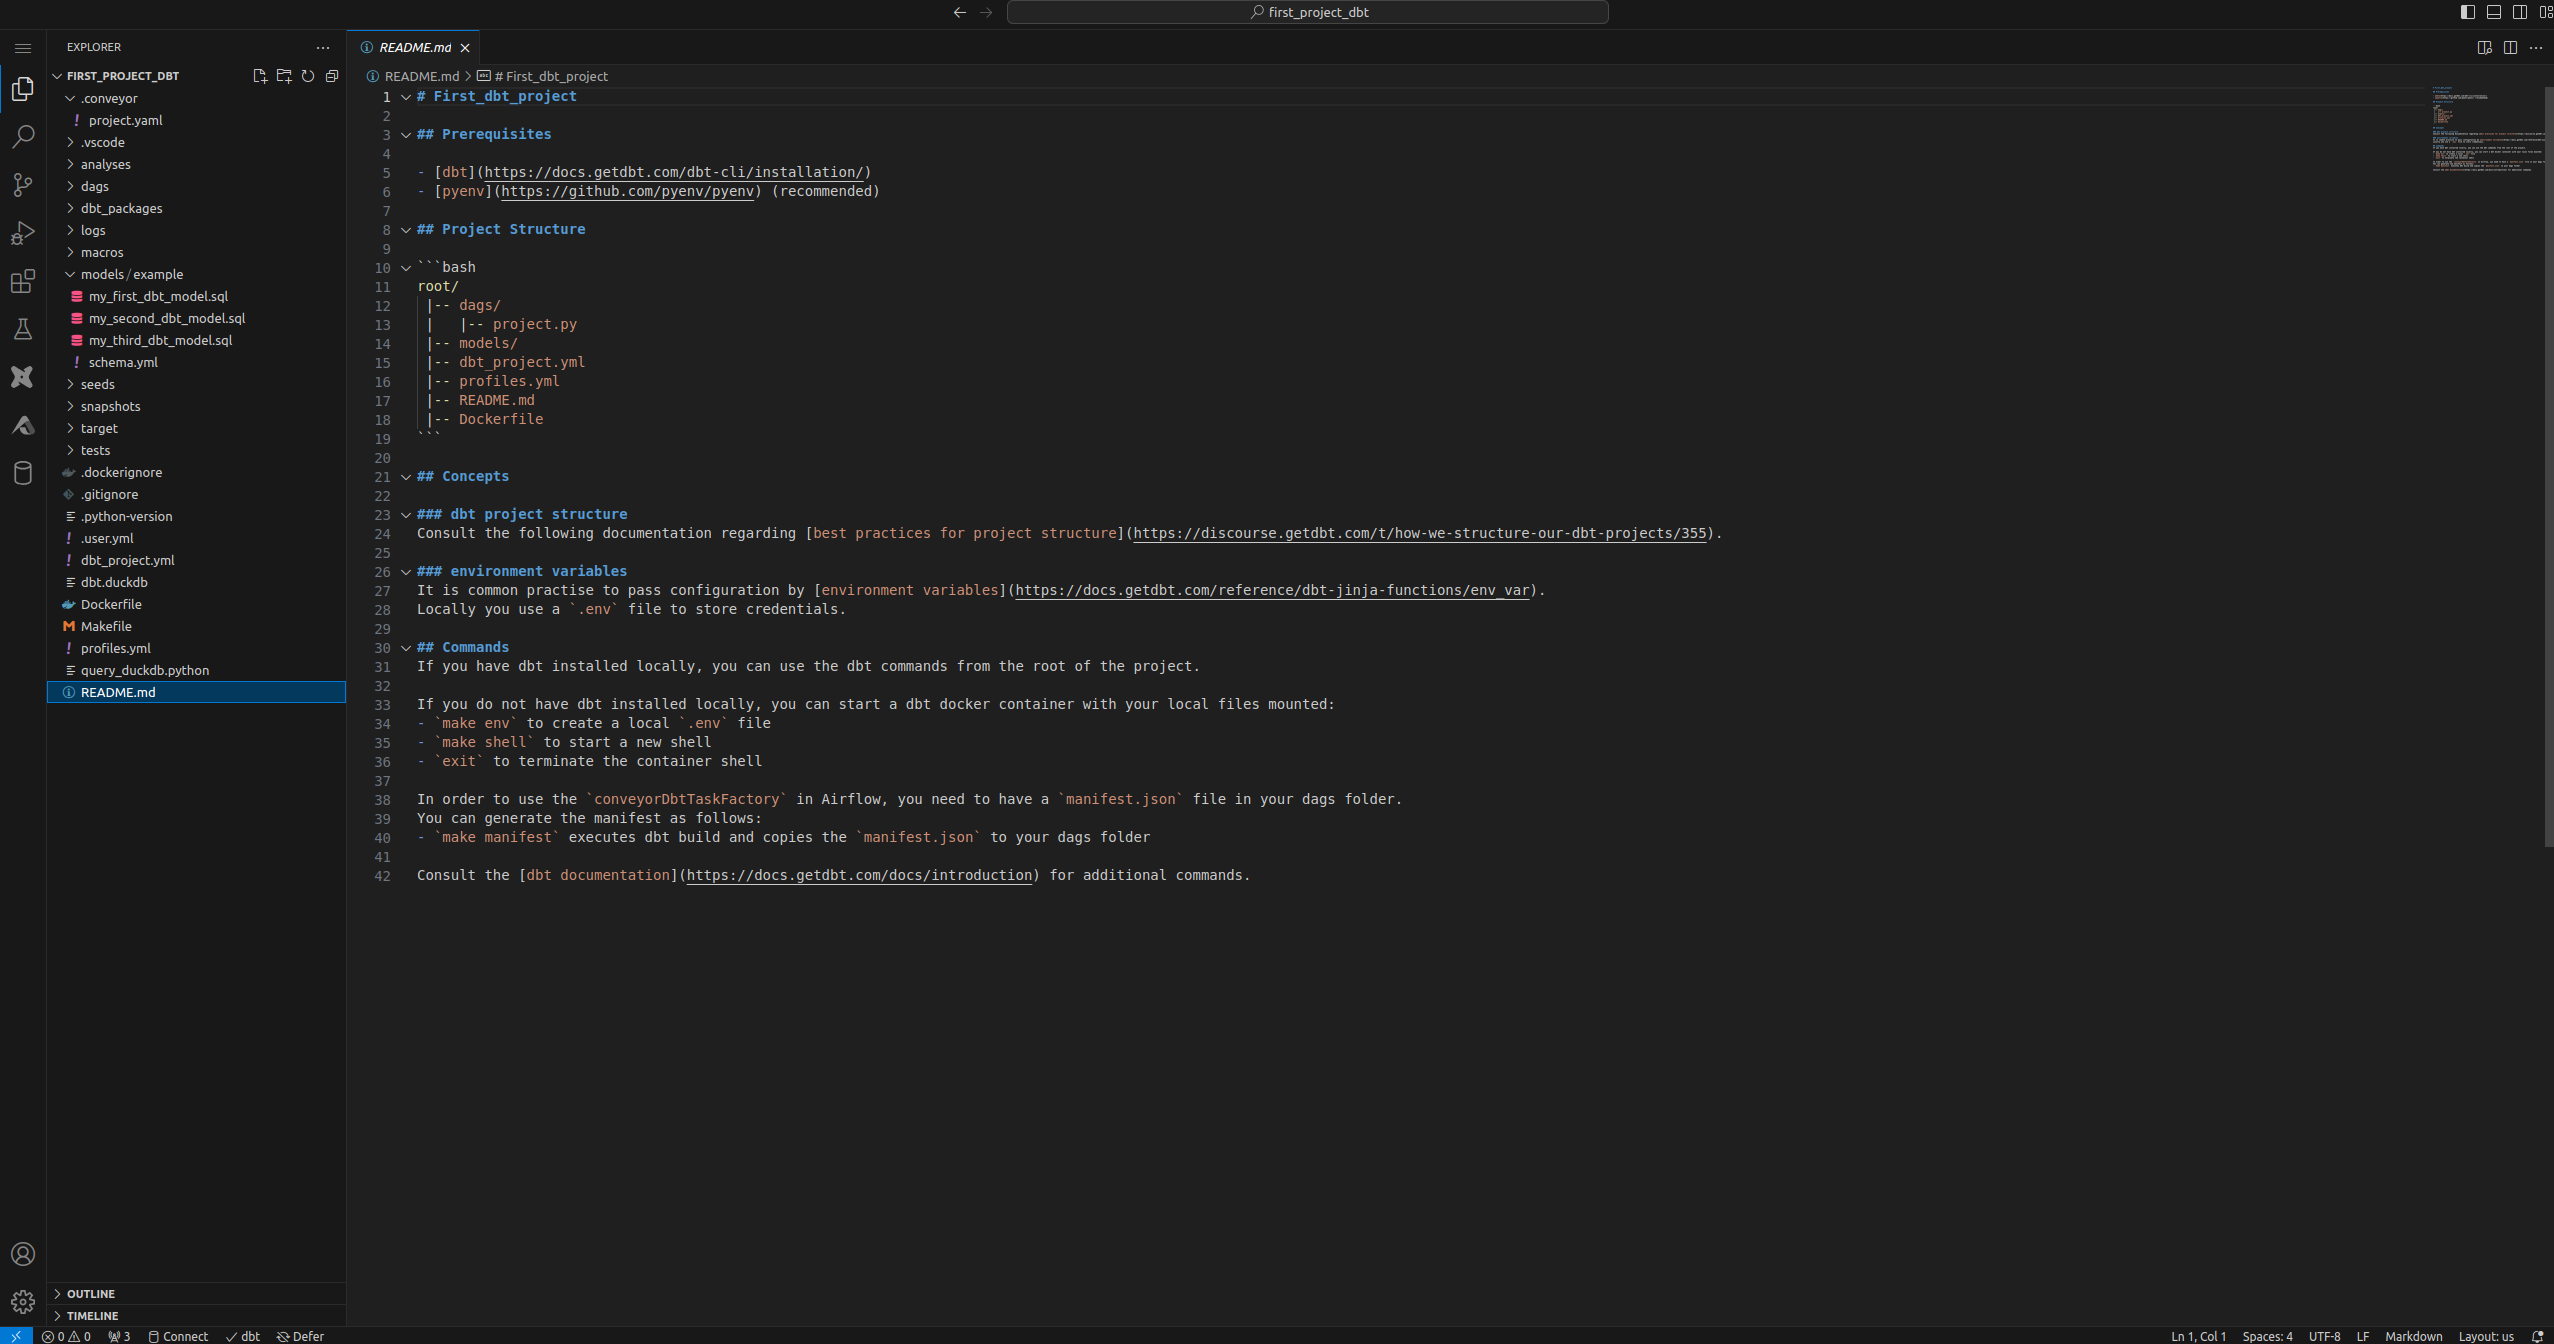
Click on the create button to launch the IDE, this will take a minute before it will open a new tab and provide you with a VS Code environment in the browser containing your dbt code. Now you should see something like this:
If you customized the ide, we first need to create the IDE image to start from, which will take about 3 minutes. The next time you start the IDE, it will be much faster as it will reuse the already created image to start the IDE from.
1.4 Explore the code
Have a look at the folder that was just created and identify the following subfolders.
cd $PROJECT_NAME
ls -al | grep '^d'
This should show you the following directories:
.conveyorcontains Conveyor-specific configuration.dagscontains the Airflow DAGs that will be deployed as part of this project. Here you will define when and how your project will run.profiles.ymlcontains the database information for the different environments.modelscontains the dbt models of the project.coffee-datacontains the raw input data that we will use.dbt_project.ymldefines the project settings such as the directory structure, default model materialization, ...Dockerfiledefines how to package your project code as well as the version for every dependency (dbt, Python, dbt integrations). We supply our own dbt images such that you can get started quickly.